The aim for this semester is to create 3 TV idents to promote one channel of my choice. These idents should hold a corporate theme throughout, so that the channel can be recognised just by these idents.
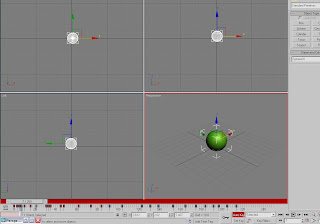
For the first tutorial of semester 2 we learnt basic animation skills, firstly we created a sphere and used auto key to create a simple animation by selected the timeline and selecting which frame we wanted the sphere to move on then moved the sphere where we wanted it. Once the sphere had been moved the auto key automatically placed a key frame on the specific frame on the timeline to remember where the sphere was positioned on that frame. The auto keys are shown on the timeline as red frames.

So once I had played around with the time line and the positioning of the sphere I had created a small basic animation. For this animation the ball bounces then goes round in circles then back round the circle in the opposite direction and finally ends up back in the starting position in the middle.

I then learnt how to use the set keys. I used these for the second part of the above animation, there are shown here on the timeline as blue tabs on the frames, they start at frame 90.

I then looked at the time configuration settings, I found this at the bottom right hand corner of the window, it looked like a red clock half submerged into a box, I then opened this up and played around with the settings and what they can do. I changed the frames per second settings to speed up or slow down the animation, I also added frames to the animation by changing the length settings under the animation headings. I also experimented with the playback settings and the playback speed.

I then opened up the mini curve editor, to do this I selected the mini curve editor icon from the bottom left hand corner of the window, then this appeared,
I then used the slide settings to move the curves about and used the move keys to move the peaks of the curves around to change the animation settings, and looked how to add sound tracks to the animation.
I then moved onto opening the curve editor, to do this I selected ‘graph editors’ from the top toolbar, then selected ‘track view - curve editor’ then the curve editor window appeared.

I found my way around the curve editor, some of the changes I made were mistakes but helped me find out how to make my sphere rotate and do other movements, other mistakes made my animation jumpy and out of time.
Next I went on to learn how to create dummy object and link them to an object.
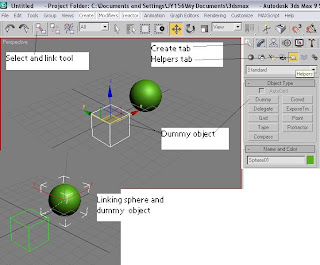
This is useful if you need the ears on someone’s head to follow the head and stay in position as they move. To do this I firstly had to create the dummy object,
‘Create’ tab then the ‘helpers’ tab then selected the ‘dummy’ button, then clicked and dragged out my dummy object onto the stage.
I then moved onto opening the curve editor, to do this I selected ‘graph editors’ from the top toolbar, then selected ‘track view - curve editor’ then the curve editor window appeared.

I found my way around the curve editor, some of the changes I made were mistakes but helped me find out how to make my sphere rotate and do other movements, other mistakes made my animation jumpy and out of time.
Next I went on to learn how to create dummy object and link them to an object.
This is useful if you need the ears on someone’s head to follow the head and stay in position as they move. To do this I firstly had to create the dummy object,
‘Create’ tab then the ‘helpers’ tab then selected the ‘dummy’ button, then clicked and dragged out my dummy object onto the stage.

I then used the ‘select and link’ tool from the top left corner of the window to link the sphere and the dummy object together, I clicked the sphere and dragged the link to the dummy object.
I then opened the ‘schematic view’ window to check the 2 objects are linked together, this window shows a hierarchy view of the stage which allowed me to see the links I had created.
I then opened the ‘schematic view’ window to check the 2 objects are linked together, this window shows a hierarchy view of the stage which allowed me to see the links I had created.
Finally once I had created my basic animation I wanted to render it to an AVI movie file. To do this I opened the render window, I edited the ‘range’ under the ‘common parameters heading’ so that the movie file would start on my first frame and end on the frame I wanted the animation to finish at .I named the file ‘ballll’ as this is what I wanted to save it as, I then selected the file type as ‘AVI’ so it was a movie file, then finally selected the ‘render’ button.

Then the ‘AVI file compression setup’ window appeared, I used the default compressor and selected ‘ok’ then the file started rendering,

Then the ‘AVI file compression setup’ window appeared, I used the default compressor and selected ‘ok’ then the file started rendering,


No comments:
Post a Comment