Firstly I created a teapot on my scene then selected the camera tab from the right hand side toolbar and chose the target camera, (as this is good if you know what you want to focus on, or if you have a specific viewpoint in mind) for this example I wanted to view the handle, I then right clicked the camera and selected ‘set view to selected camera’ and this gave me the viewpoint from the camera, and then you can tweak the and the distance of the camera until you get the view you want.


Another camera I could have used was the ‘free camera’.
I could have used this if I wanted a fly-through shot, following shot or a pan across the scene, this would be good for use in scenes such as following an animated car down a road, or following someone walking.
For my 3d modelling project:
Text on birthday cake,
Firstly I created my text by selecting the ‘text’ from the shapes tab on the right hand toolbar. I entered the text that I wanted to create, selected the size and the font of the text and then I clicked on my stage to create the text.
I then converted the text to an editable poly and use the texture tool on it to give it depth and to make it 3d, I done this so that it would look as it the letters have actually been stuck onto the birthday cake.
Once it had been extruded I then selected it and went to modify then selected ‘Bend’ within the drop down menu, then the bend options appeared, I could then select where I wanted the text to bend from and how many degrees I wanted the text to bend.
Once the text was bent enough to fit round the cake correctly I moved it into place so that it appeared to be stuck to the front of the cake.


Candles:
I created some candles in my first attempt, but this were just boring dull cylinders stuck on top of the cake, they didn’t look too bad but I just didn’t feel satisfied with them and wanted to make them more realistic and life like.
I then decide to create some more candles from scratch to look as realistic as possible, so I looked at some candles and realised one of the main features of most candles are the twisted ridges that run around the candles form top to bottom, so I decided to incorporate this within my candles.
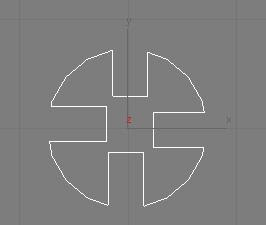
So I decide to create a cylinder with a small ridge in it created from using the Boolean tool on a rectangle sunk into the cylinder then twisting the cylinder using the twist modified. I then tried to make the candle twist with one Boolean line extracted from it but didn’t look very good or very detailed so wanted to add more Boolean lines to make it look more realistic, effective and twisted like a real candle. So I deleted this candle and started to create another cylinder with 4 lines going down it which I created using Boolean and pro-Boolean tool and 4 rectangles. Here is a shot of the cylinder with the 4 rectangles embedded within it,


So I decide to create a cylinder with a small ridge in it created from using the Boolean tool on a rectangle sunk into the cylinder then twisting the cylinder using the twist modified. I then tried to make the candle twist with one Boolean line extracted from it but didn’t look very good or very detailed so wanted to add more Boolean lines to make it look more realistic, effective and twisted like a real candle. So I deleted this candle and started to create another cylinder with 4 lines going down it which I created using Boolean and pro-Boolean tool and 4 rectangles. Here is a shot of the cylinder with the 4 rectangles embedded within it,


Here is the pro-Boolean tool and the effected cylinder,


I then added the ‘twist’ modifier to it and used the twist options to get the right effect of how many degrees I wanted to twist it, here is a screenshot of the twisted cylinder with the ridges in it.


I then added a cone on to the top of the candle and resized it so that it would fit the top of the cylinder nice and smoothly to make it look like a real candle and finally I added a wick, for this I used a white cylinder and got an image of string from the internet and used this as a map for the cylinder to make it look like a real candle wick made from string. I also used the bend modifier to slightly bend the wick to give it more realism.
Here is what the final candle looked like, I am pleased with the outcome.

I also searched the internet for ways to create a realistic candle flame to make the scene look as real as possible. I tried a few online tutorial that I found, but none of them really caught my eye or looked realistic enough to put on the cake, they looked out of place and different to the cake and candles.
No comments:
Post a Comment